
What Actually Happens Under a Sunken Slab
From what we see every spring across Hartford, a sunken slab almost never means the concrete itself failed. The material simply ran out of solid ground to sit on.
Water washes out the fine dirt underneath, and our 30-plus annual Connecticut freeze-thaw cycles do the rest.
When trapped water freezes, it expands by 9 percent, levering the hidden cavity wider year after year until the slab finally drops.
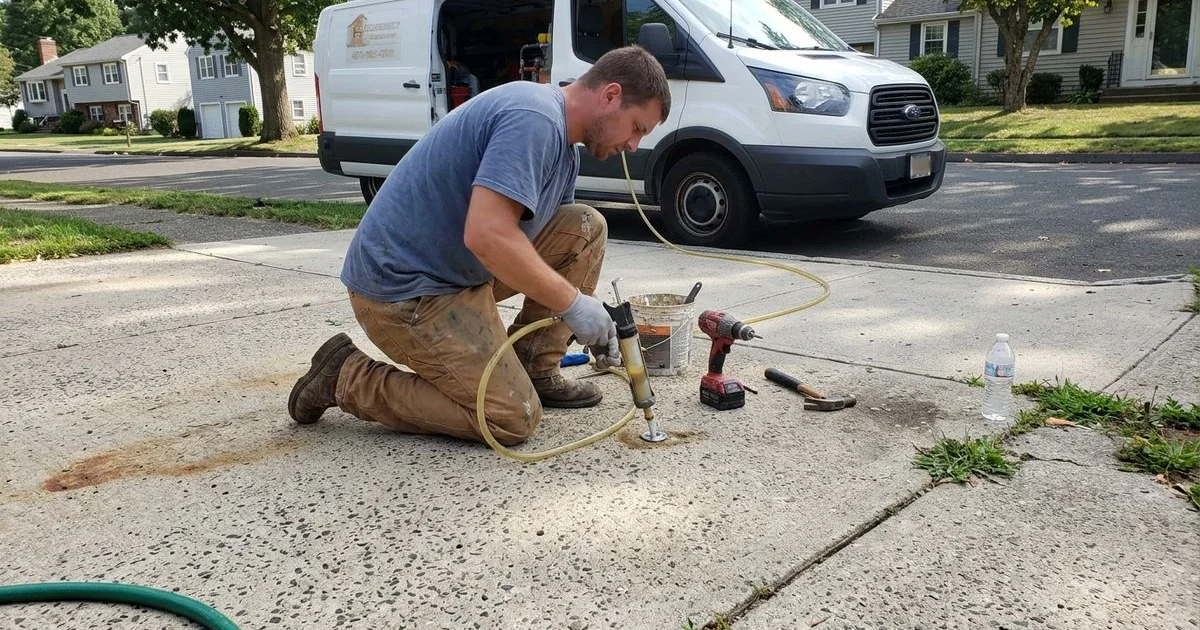
Polyurethane concrete leveling fixes this specific problem by injecting structural foam, like Alchatek AP Lift 440, to replace the missing support. The expanding polymer forces the concrete back to grade.
To give you the specifics for a common scenario, we will walk through the exact steps for driveway leveling. We are going to cover the materials used, the setup process, and why this method saves property owners thousands of dollars.
Let’s look at exactly how does concrete leveling work.
Step One: Sounding and Marking
The first step in any leveling project is locating the exact size and shape of the hidden void. We never drill until we fully map the slab.
Our crew works across the surface with a heavy sounding hammer. This tool lets us listen for the distinct change in tone that marks an unsupported section.
A slab sitting on solid ground rings dull. You will hear a noticeably hollow sound over a cavity.
That boundary between the two is usually sharper than most people expect.
- Hollow sounding zones that indicate soil washout
- Fixed reference points like a garage threshold or street edge
- Existing cracks that could shift during a lift
- Hidden utilities or irrigation lines nearby
Our team chalks these boundaries directly on the surface while measuring the drop against fixed reference points. The goal is sitting flush with the surrounding structures, rather than simply raising it as high as it will go.
This precise survey dictates the hole spacing, which requires a real decision based on your specific slab geometry. Too few ports will cause an uneven lift, while too many mean marking the concrete for no structural benefit.
On a typical driveway section, the pattern forms a calculated grid. The spacing is adjusted carefully around joints and anything known to be underneath.
Step Two: Penny-Sized Ports
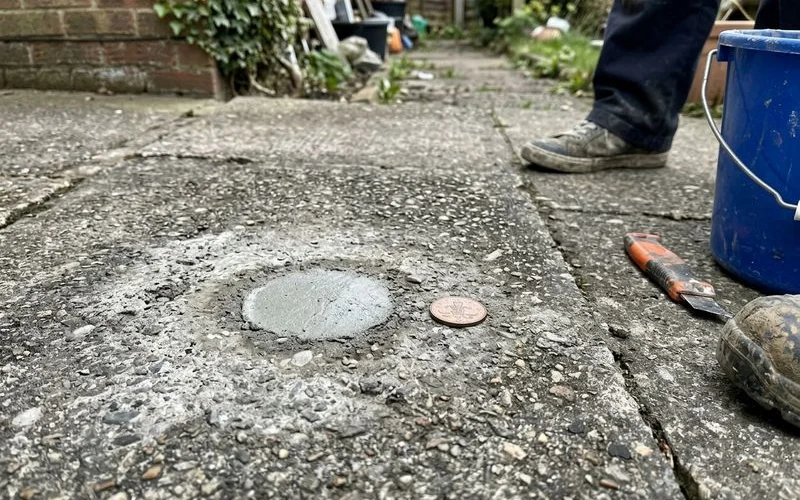
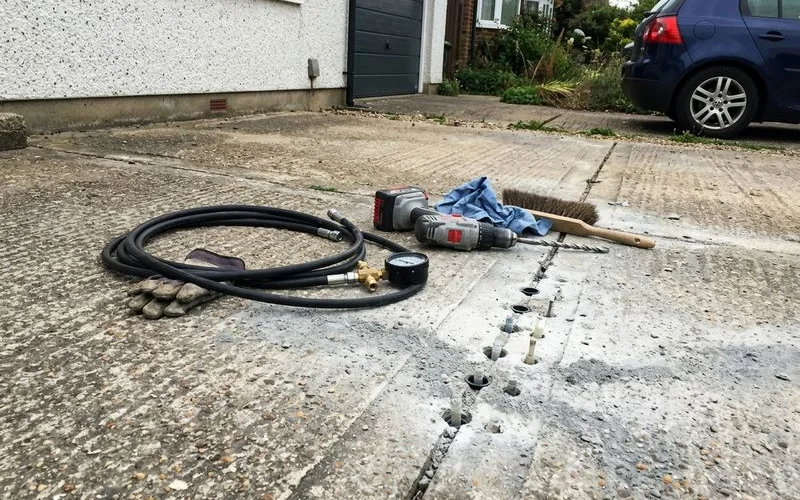
We drill 5/8-inch holes through the slab to create access points for the expanding foam. That is roughly the diameter of a standard penny.
This small footprint is the single most visible difference between polyurethane injection and older methods. Traditional mudjacking requires massive 2-inch or 3-inch holes to move a heavy volume of slurry material.
Keeping the drill holes to 5/8 of an inch preserves the visual integrity of older, decorative, or stamped concrete surfaces.
The drilling phase moves quickly and acts as the loudest part of the day. The noise is temporary, and the entire setup finishes fast.
We run dust extraction directly at the drill bit when working indoors in a basement or garage. Containing the working area is a priority because airborne silica dust matters far more inside a house than it does out on a driveway.
Step Three: Fill First, Then Lift
The foam does not push the slab up immediately; it must completely fill the hidden void first. This is the stage where most people picture the mechanics incorrectly.
The polyurethane injection process begins when we pump a two-part polymer, like a high-density 4-pound structural foam, through the port. This material starts expanding up to 18 times its original volume on contact.
The very first thing the polymer does is find the void and fill it. The liquid flows into the cavity, takes the shape of the space, and compacts against the surrounding soil as it grows.
- You cannot lift without filling the void completely first.
- The volumetric expansion is what generates the actual upward force.
- Compacting the loose soil prevents future settling.
Pressure only begins to raise the concrete once the cavity is entirely packed and the foam has nowhere left to go. From there, the slab comes up in closely monitored increments.
Our technicians keep a precision level on the concrete throughout the entire process. Injection is worked strategically from port to port rather than emptying a massive batch into one single hole.
Rushing a lift is exactly how sound slabs crack. This controlled rate lets a single low corner come up to meet the rest of the unit, while the good side remains completely undisturbed.
Step Four: Cure, Patch, Return to Use
The polyurethane reaches 90 percent of its full structural strength in just 15 to 30 minutes. High-density formulations easily handle heavy vehicle loading, meaning most driveways can take a parked car the very same day.
| Stage | What’s happening | Typical duration |
|---|---|---|
| Sounding and marking | Locating the void, setting the target level | 15-30 minutes |
| Drilling ports | 5/8-inch holes to the planned pattern | 20-40 minutes |
| Injection and lift | Cavity filled, slab raised in increments | 30-90 minutes |
| Cure to load-bearing | Foam reaching working strength | 15-30 minutes |
| Patching and cleanup | Ports sealed, site swept | 20-30 minutes |
This concrete lifting process finishes cleanly. We patch the ports completely flush, and a straightforward mortar patch works perfectly on plain concrete.
For stamped or coated surfaces, our technicians plan the patching material before drilling even starts. The compound is carefully color-matched to the surrounding finish.
Our team sweeps the site clean, and you can put the slab right back into service. A typical residential job takes only a few hours from arrival to final cleanup.
Why Nothing Gets Torn Up
Everything described above happens entirely from the top of the slab. There is no excavation, no demolition phase, no rented dumpster, and no material stockpile killing the lawn.
The pumping equipment stays out on the rig, and only the hoses run up to the ports. This cleanliness makes a massive practical argument for most homeowners.
| Factor | Polyurethane Leveling | Full Concrete Replacement |
|---|---|---|
| Site Impact | Top-down only, no heavy machinery | Excavators, dumpsters, torn up landscaping |
| Average CT Cost (2026) | Usually thousands less | $6,400 to $14,500 ($8-$20 per sq. ft.) |
| Return to Service | 15 to 30 minutes | Up to 7 days for full cure |
| Mess Level | Contained dust, clean finish | Demolition debris, concrete dust, deep ruts |
A property with mature plantings, established edging, or an irrigation run loses a great deal during demolition. You avoid that entire loss with a clean lift.
Those hidden landscaping repair costs rarely appear on a replacement quote. The method also compares directly against the older approach it replaced.
The specific details are worth reading if you are holding two quotes, especially regarding how it compares to mudjacking.
What This Process Can’t Do
Lifting specifically addresses sub-surface voids and settling, but it cannot repair structural failures. It is crucial to be clear about the limits of foam injection because these boundaries decide whether this is the right work for your slab at all.
- Surface deterioration: Spalling, delamination, and crumbling edges mean the concrete has reached the end of its lifespan.
- Tree root heave: This is upward pressure from a living root, not an absence of support.
- Foundation wall movement: Severe structural shifting requires a different specialist.
No amount of support underneath changes the reality of crumbling surface concrete. We state these facts clearly at the inspection, rather than surprising you after an invoice is signed.
Honest assessment is the entire point of an on-site visit. Our team sounds the slab, measures the drop, and writes down exactly what it needs.
Sometimes the answer is that the foam jacking process is simply not the right fit. If you are still wondering how does concrete leveling work for your specific property, you can book a free inspection, and our technicians will evaluate your actual concrete rather than guessing based on a general case.