
You’ve Decided. Now What Does the Day Look Like?
We hear the same practical questions every time a homeowner books a driveway leveling project here in Hartford County.
The uncertainty is rarely about whether the lift will work. Instead, folks want to know how long the crew will be there, how much mess to expect, and when they can park their cars again. If you are still at the diagnosis stage, why a driveway sinks covers the causes before the crew ever books a date.
Our team put together this exact guide to walk you through the step-by-step driveway leveling process. Let’s look at the noise levels you can expect, the exact timeline of the day, and the specific cure times that get you back on your concrete the very same afternoon.
Before the Day: What You’ll Be Asked to Do
Our office will tell you exactly which sections of the driveway need to be clear when your job is officially booked. Homeowners only need to clear the settled sections plus about a 10-foot working perimeter, rather than emptying the entire driveway.
- Move all vehicles: Park cars on the street or in the garage if we are working near the street apron.
- Relocate portable items: Slide trash bins, heavy planters, and bikes at least 10 feet away.
- Unlock access gates: If your property has a side gate we need to pull hoses through, leave it unlatched.
- Clear organic debris: A quick sweep of wet leaves or pine needles helps the crew see the concrete joints clearly.
Our preparation list stops right there. You do not need to wash the concrete or do any heavy lifting before the truck pulls up.
Arrival and Assessment
We arrive in a self-contained box truck and park the rig where our hoses can comfortably reach the sunken slabs. The first step on site is re-checking the concrete against what was measured during your initial inspection.
Connecticut weather changes rapidly between the quote and the actual driveway lift day. A late spring freeze or a heavy wet spell often shifts the soil slightly underneath the surface. Our crew checks a few specific details rather than assuming nothing has moved:
- Current cavity depth: Verifying how much the ground settled since the estimate.
- Hidden voids: Sounding the slab with a heavy rod to find empty pockets.
- Reference points: Identifying fixed elevations like the garage floor or the street edge.
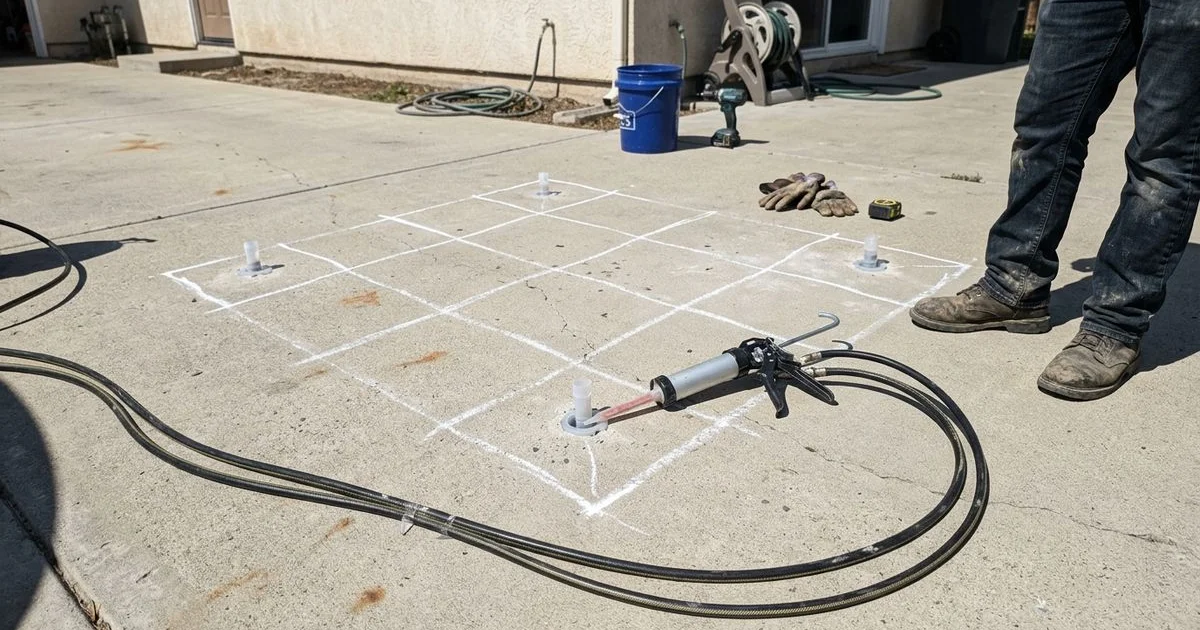
Chalk outlines mark the exact extent of the cavity directly on the concrete surface. A 4-foot Stabila spirit level and a laser level help us set the final target pitch.
Our target is always to make the lifted section completely flush with the surrounding concrete. The goal is a smooth transition, not just pushing the material as high as it can physically go.
Drilling the Ports
Our technicians plan the exact port pattern before a single hole is drilled into your driveway. A standard grid pattern works best, but the spacing must adjust around existing expansion joints and surface cracks.
Spacing these injection points is a critical decision that requires real field experience. Too few holes will cause the lift to come up unevenly by concentrating too much force in one specific area. Too many holes will mark up the slab for absolutely no structural benefit.
Our drilling process takes roughly 20 to 40 minutes on a standard residential driveway. This is the loud part of the day, as a rotary hammer drill hitting concrete generates around 100 to 120 decibels of noise.
The drilling phase generates noise levels similar to a loud ambulance siren, so closing your front windows is a great idea for this brief 40-minute window.
After this step is complete, the rest of the concrete leveling appointment is completely quiet.
Injection and the Lift Itself
This specific phase of the job is worth understanding because it operates differently than most people picture. The two-part polyurethane polymer goes in through a port and begins expanding immediately as a liquid.
The very first thing it does is find the underground cavity and completely fill it. The foam flows into the empty space and compacts heavily against the surrounding Connecticut soil.
Filling the Underground Voids
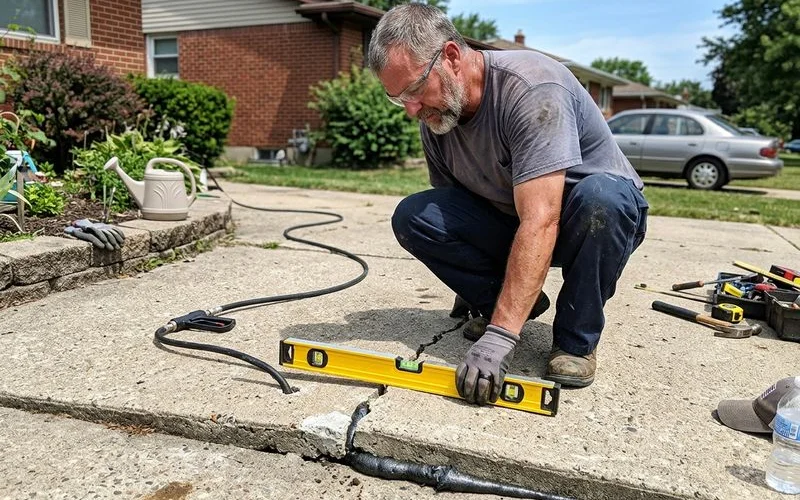
Our material only begins to raise the heavy concrete slab once the void is completely packed tight. From there, the lift is worked slowly from port to port while a level sits on the concrete throughout the entire process.
We inject a little burst of foam, watch the surface react, move to the next port, and then come back. The slab comes up in tiny increments of fractions of an inch, rather than one continuous aggressive push.
| Foam Characteristic | Performance Metric | Why It Matters For Your Driveway |
|---|---|---|
| Compressive Strength | 80 to 100 PSI | Supports 11,500+ lbs per square foot |
| Expansion Rate | 20x to 30x liquid volume | Fills tiny micro-voids before lifting |
| Hydrophobic Nature | Repels ground water | Prevents washouts during heavy rain |
Achieving the Perfect Pitch
Our deliberate control over the injection is what keeps sound slabs from cracking under pressure. On a driveway section with just one low corner, this patient technique allows that specific corner to come up and meet the rest without disturbing the good side. You can read more about how the material behaves in How the process works.
We also use this exact moment to set the proper drainage pitch if your driveway had previously tipped back in the direction of the house. The crew injects more material at the low end while checking the fall slope with a laser. The final result ensures that rainwater runs safely out to the street again.
Cure, Patch, Clean
Our high-density foam reaches 90% of its load-bearing strength in just 15 to 30 minutes. It is actively curing underground while the technicians are working on the next driveway section.
By the time the final port is filled, the first ones we injected are effectively finished and structurally solid. We patch the empty ports flush using a specialized non-shrink masonry mortar on plain concrete surfaces.
If your surface is stamped or colored, the patching material is carefully color-matched using an approach agreed upon before any drilling began.
| Stage | Typical duration | What you’ll notice |
|---|---|---|
| Setup and re-check | 15-20 minutes | Rig parked, slab chalked |
| Drilling | 20-40 minutes | The loud part (up to 120 decibels) |
| Injection and lift | 30-90 minutes | Quiet; slow visible movement |
| Cure to load-bearing | 15-30 minutes | Nothing to see |
| Patching and cleanup | 20-30 minutes | Ports sealed, site swept |
Our crew then sweeps the entire site and packs all the tools back into the van. A final walkthrough happens next, where you can inspect the newly leveled driveway and ask any lingering questions.
When You Can Drive on It
You can park on the repaired slab the very same day for the great majority of residential jobs. The polyurethane foam reaches an impressive compressive strength within half an hour of the initial injection.
High-density formulations used in 2026 are specifically engineered to handle immediate heavy vehicle loading. Our data shows that a standard passenger car tire only exerts about 35 to 40 PSI of pressure on the ground.
The high-density foam we inject offers 80 to 100 PSI of support, which means it easily handles the weight of a heavy pickup truck right away. A few specific factors can alter this timeline:
- Commercial vehicle weight: Box trucks or heavy machinery require a full 24-hour cure.
- Extreme ground temperatures: Deep freezing conditions can slow the foam expansion slightly.
- Extensive joint sealing: If we apply joint caulk, you must avoid driving over the fresh sealant for a few hours.
We will clearly communicate if any of these conditions apply to your specific job. Standard residential jobs are almost always ready for same-day parking.
What It Looks Like Afterwards
Your final result is a properly leveled concrete surface featuring a neat row of small, patched circles. The mortar patches retain the same weathering and base color as the rest of your property.
These 5/8-inch spots are incredibly easy to miss from a normal standing height. Our process eliminates the massive headaches associated with full concrete replacement, meaning you entirely avoid:
- Arranging collection for a giant debris dumpster.
- Repairing rutted lawn edges damaged by heavy machinery.
- Parking on the street for a week while fresh cement cures.
The best way to protect this new base is having your concrete joints sealed while the crew is already on site. Sealing the gaps keeps seasonal rainwater out of the newly stabilized base, which is crucial for surviving harsh Connecticut winters.
This preventative step gets done in the exact same visit rather than requiring a second service call.
If you were wondering what to expect concrete lifting, this timeline shows exactly how straightforward the process really is.
Ready to get your project scheduled? Book your lift today, and our team will confirm the working area and what needs clearing when we set the date.